There’s something truly magical about the process of baking bread at home, especially when it comes to sourdough. The rich flavors, the crusty exterior, and that soft, chewy crumb—sourdough bread is a homemade delight that’s worth every moment spent in the kitchen. Today, I’m excited to share my tried-and-true sourdough bread recipe that’s perfect for both beginners and experienced bakers alike.
What is Sourdough Bread?
Sourdough bread is a type of bread made through a fermentation process that utilizes naturally occurring lactobacilli and yeasts. This process not only leavens the bread but also gives sourdough its distinct tangy flavor and chewy texture. Plus, it’s easier to digest and has a longer shelf life than commercially yeasted bread!
Follow this step by step guide, baking bread at home have never being so easy.
Ingredients
- For the Starter:
- 1 cup (120g) all-purpose flour (or bread flour)
- 1/2 cup (120ml) lukewarm water
- For the Bread:
- 1 cup (240g) active sourdough starter (fed and bubbly)
- 1 1/2 cups (360ml) lukewarm water
- 4 cups (480g) all-purpose flour (or bread flour)
- 1 1/2 teaspoons salt
Instructions
Step 1: Prepare Your Sourdough Starter
- Feed Your Starter: Make sure your sourdough starter is active and bubbly. Feed it by combining 1 cup of all-purpose flour with 1/2 cup of lukewarm water. Let it rest for about 4-6 hours at room temperature, or until it has doubled in size.
Step 2: Mix the Dough
- Combine the Ingredients: In a large mixing bowl, mix 1 cup of active sourdough starter with 1 1/2 cups lukewarm water. Stir together until fully combined.
- Add Flour and Salt: Gradually add 4 cups of flour and 1 1/2 teaspoons of salt. Mix until the dough comes together; it may be sticky, but that’s okay!
Step 3: Knead the Dough
- Autolyse: Cover the bowl with a cloth and let it rest for 30 minutes. This process allows the flour to hydrate and makes kneading easier.
- Kneading: Lightly flour your work surface, turn out the dough, and knead it for about 10 minutes until it becomes smooth and elastic. Alternatively, you can use the stretch-and-fold method: stretch one side of the dough, fold it over the center, and repeat for all sides.
Step 4: First Rise
- Bulk Fermentation: Place the dough back into a lightly greased bowl, cover it, and let it rise at room temperature for about 4-6 hours, or until it has doubled in size. You can also let it rise in the refrigerator overnight for a slower fermentation, which enhances the flavor.
Step 5: Shape the Dough
- Pre-Shape: Once the dough has risen, gently turn it out onto a floured surface. Pre-shape it into a round or oval by tucking the edges into the center. Let it rest for 20-30 minutes.
- Final Shape: Shape the dough into your desired loaf shape (round or batard) and place it seam-side down in a well-floured proofing basket or bowl lined with a cloth.
Step 6: Second Rise
- Proof: Cover the dough and let it rise for another 2-4 hours at room temperature or in the fridge for a longer cold proof (8-12 hours), allowing the flavors to deepen.
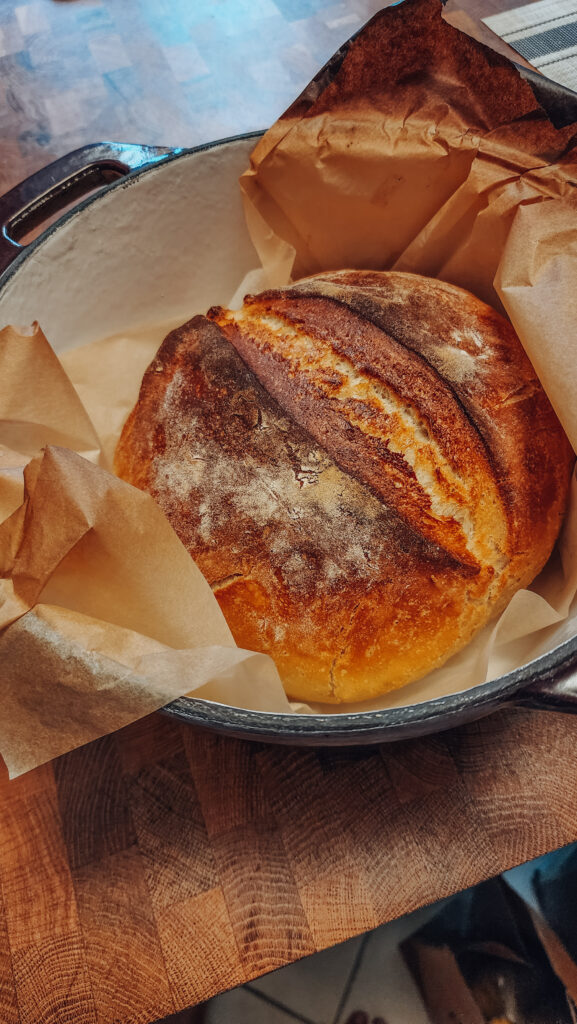
Step 7: Bake the Bread
- Preheat the Oven: About 30 minutes before baking, preheat your oven to 450°F (230°C) and place a Dutch oven or baking stone inside to heat up.
- Score the Dough: Once the dough is ready, carefully transfer it onto a piece of parchment paper. Use a sharp knife or razor blade to score the top of the loaf, allowing it to expand during baking.
- Bake: Carefully remove the hot Dutch oven, then lift the parchment with the dough and place it inside. Cover with the lid and bake for 30 minutes. Then, remove the lid and bake for an additional 15-20 minutes, or until the loaf is golden brown with a crusty exterior.
Step 8: Cool and Enjoy
- Cool: Once baked, remove the bread from the oven and let it cool on a wire rack for at least an hour before slicing.
Let me know in the comments how did it go baking your own bread at home!


Leave a Reply